Make festive snowflakes using just 16 plastic hangers
Have you ever cleaned out your closet only to end up with a box of plastic hangers you no longer need? Perhaps you found hangers on sale at one point but ended up with more than you could possibly ever use. Instead of giving them to other people, tossing them out, or taking them to your local thrift store, use them to make beautiful snowflakes.
Even if you’re not overly creative, this project is easy to do. In fact, this is something you and your kids could do together. In no time, you’ll end up with gorgeous holiday decorations.
Homemade holiday decorations that don’t cost a fortune.
Most people add new decorations to their collection every year as a way of keeping things interesting. But that often means forking out a lot of money. This year, why not do something different … make snowflakes from hangers that you already have on hand. The finished project will impress everyone. All you need are the hangers and some white zip ties – that’s it.

The instructions are unbelievably easy to follow.
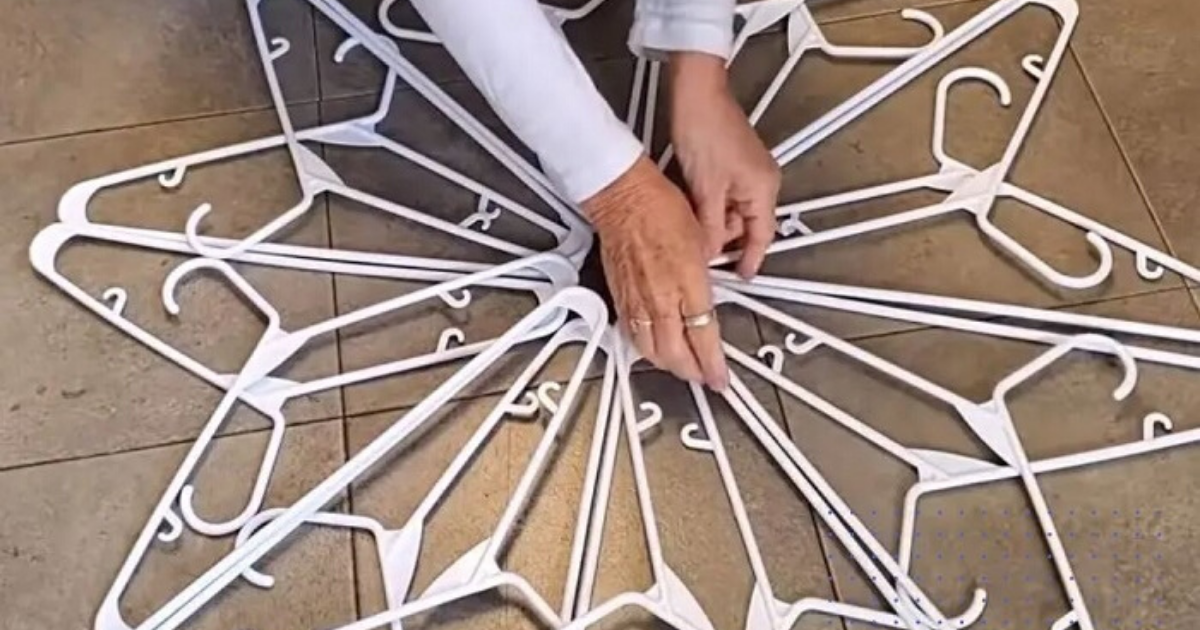
For big snowflakes, choose adult-size hangers. For smaller ones, go with baby hangers. Just make sure you have 16 in all. Start by clearing a space on the floor or a table where you can work freely. Then, you’re going to place two hangers on the surface, with the hook to the outside and the ends connected in the center. Keep doing this in pairs until you have 8 hangers lined up.

Repeat the pattern.
You’ll do the same thing with the remaining 8 hangers. But this time, flip them so the hooks face a different direction. The reason…that’s what creates the distinct snowflake pattern. Of course, this is just the basic design. Once you get the hang of it, you can get as creative as you want. Keep layering until you’ve used all the hangers.

Whip out the zip ties.
Once you have the “snowflake” laid out, the next step involves securing the hangers with white zip ties. Initially, don’t make them too tight. That way, you can adjust the hangers as needed until you’re completely happy with the pattern. For this, zip tie together two bottoms from the lower layer of the snowflake and two hooks from the top. Continue this until you have all the outer sections connected.

Now you’re going to focus on the inner circle portion of the snowflake.
As you did before, you’ll secure the hangers in groups of fours while keeping the zip ties relatively loose. When finished, you can easily make whatever adjustments you want. When you’re satisfied with how the snowflake looks, go around the layers to tighten all the zip ties.

Decorate the snowflake however you want.
Now comes the fun part. Using hot glue, you can secure embellishments to your creation. You can spray-paint the hangers, apply spray-on adhesive and then add glitter, intertwine miniature Christmas lights, and so on. You can even leave the hangers white if preferred. The possibilities are endless.

This decoration would look gorgeous inside or outside your home. This would also be a great project to help other people. You could take some snowflakes to a nearby nursing home, give them to families who don’t have a lot, or even sell them, using the money for a good cause.
Please SHARE this with your friends and family.
Source: Home Hacks, YouTube